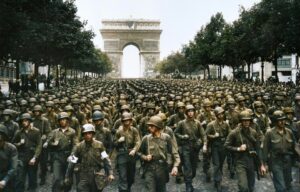
Charge!

Bombers in actions

This aerial photo shows Consolidated B-24 Liberators from the Fifteenth Air Force flying over Ploești, Romania, in August 1944. They were targeting an oil refinery, and the thick clouds of smoke in the sky show that their mission was successful.
It’s a bird, it’s a plane…

Dogfight over London

On October 8, 1940, at the height of the Blitz, German forces carried out a daytime air raid over Britain. The photograph above captures the smoke streaks carved across the sky as British and German aircraft clashed in aerial combat above the city.
Up in flames

The third photograph in our collection from the Second World War shows the American destroyer USS Shaw (DD-373) moments after it was struck by multiple bombs during the Japanese attack on Pearl Harbor. The image captures the dramatic explosion of the ship’s forward magazine, making it one of the most iconic photos from the attack’s aftermath.
Rescue mission

In 1942, a British pilot is left adrift at sea, waiting nervously for help while sheltering in a small inflatable raft. Rescue soon arrives when an Air-Sea Rescue Service Supermarine Walrus flying boat is dispatched to recover him.
Utah Beach

This photograph from the Second World War era provides an aerial view of a landing during D-Day. It shows the arrival of American forces at Utah Beach on June 6, 1944, predominantly consisting of troops from the 4th Infantry Division and the 70th Tank Battalion. They were reinforced by the 82nd and 101st Airborne Divisions, which had been dropped earlier in the day.
Spotted on the horizon

Bombing of Nagasaki

A massive mushroom cloud rose over Nagasaki, Japan, on August 9, 1945, as the U.S. military dropped the atomic bomb known as Fat Man. This unforgettable image was captured by 1st Lt. Charles Levy, a member of the 393rd Bombardment Squadron, 509th Composite Group. Using his personal camera, he took the photo from a B-29 Superfortress flying nearby.
The bombings of Hiroshima and Nagasaki played a key role in bringing World War II to an end by forcing the surrender of the Japanese Empire. Along with devastating both cities, the explosions led to the deaths of over 200,000 Japanese civilians—about 140,000 in Hiroshima and 74,000 in Nagasaki.
Head first

A Douglas SBD Dauntless “noses over” after landing on the deck of an American aircraft carrier following a test flight in 1943. Despite what it looks like, neither the pilot nor the gunner were injured.
A deadly fall

On April 10, 1945, the 322nd Bombardment Group (Medium), Eighth Air Force was sent to strike numerous aerodromes and ordnance depots north of Berlin, Germany. Struck by an 88 mm flak burst, one of the bombers, the Boeing B-17G Flying Fortress Wee Willie, lost its wing. Despite the disastrous hit, the overall mission is said to have been successful.
Don’t look up

In this photo taken during the Battle of Kursk in 1943, Red Army soldiers hunker down in a trench. Over top of them is a T-34 tank, which is moving in to fight the German forces. One of the major offensives to occur on the Eastern Front during World War II, the over-one-month battle ended in a Soviet victory.
Attacking from all fronts

This aerial photograph captures the staggering magnitude of the Allied landings on D-Day.
Although numbers alone can hint at the operation’s vast scale, the image makes it tangible at a glance. The troops, naval vessels, and aircraft visible here represent only a fraction of the massive undertaking, illustrating the extraordinary level of planning, coordination, and logistical execution required for the largest amphibious invasion of the Second World War.
Watching her go down

Members of the US Coast Guard watch from the deck of the USCGC Spencer (WPG-36) while a depth charge explodes in front of them. It was laid against German U-boats and was very successful at taking out the U-175 on April 17, 1943. Prior to being taken out by the Americans, U-175 had participated in three war patrols and sunk 10 merchant ships.
Is that a bus?

During a nighttime air raid on London during the Blitz, an entire bus wound up stuck in one of the bomb craters. Over the course of the operation, the Luftwaffe dropped over 100 tons of explosives over the UK.
A crater or two

A reconnaissance image captured by the Royal Air Force (RAF) Bomber Command depicts a bomb assembly and launch bunker in Siracourt, France. This vital intelligence helped plan and coordinate a strike by the U.S. Army Air Forces on June 25, 1944.
The site was subjected to repeated bombing raids throughout World War II, as shown by the numerous craters scattered across the surrounding landscape in the photograph.
‘Fire-ing’ squad

In the spring of 1940, a unit of Italian soldiers armed with flamethrowers was stationed near the Egyptian border. These weapons proved highly effective and served various purposes. Notably, they were used as a tactical siege weapon.
Better than horsepower

Following heavy aerial bombings, especially in cities such as Hamburg, locals had to devise creative methods to remove the rubble. One surprising aid came in the form of elephants. In November 1945, two working elephants—Mary and Kieri, probably from a nearby circus or zoo—were photographed dragging a destroyed vehicle through the war-torn streets. Their impressive strength and steady temperament made them invaluable in the postwar cleanup, at a time when both machinery and human labor were in short supply.
Into the spotlight

In 1943, a Douglas C-47 Dakota belonging to the British Overseas Airways Corporation was captured in a striking image—silhouetted by searchlights as it prepared for a night flight from Gibraltar to the UK. Gibraltar played a vital strategic role for the Allies during World War II, serving as a key staging point for operations in the Mediterranean. Beneath the famous Rock of Gibraltar, engineers expanded a vast network of tunnels that could serve as fortified shelters and operational centers in the event of an enemy assault. Thankfully, neither the tunnels nor the troops assigned to defend them were ever called into action.
Half an aircraft

More from us: Behind-the-Scenes Facts About ‘Crimson Tide’
This Boeing B-17C Flying Fortress was damaged during the Japanese attack on Pearl Harbor. It subsequently lost its back end, leaving only the front. In this photo, it sits on the tarmac near Hangar Five at Hickam Field.