Thanks To Szymon Serwatka This Guest Blog
Translation: Piotr Wiśniewski
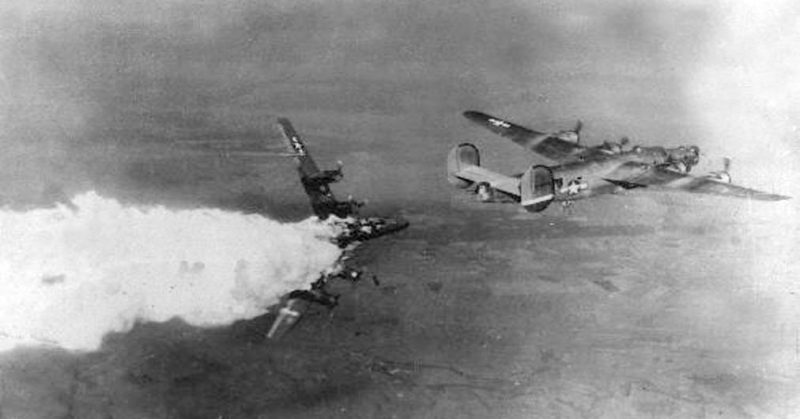
Very few wartime photos show the terror and violence of air war with such expression. The photo had been published in 1944 by most of the leading newspapers, and it remains one of the most well known WWII photos today.
Where was the photo taken? Perhaps over the oil fields of Ploesti in Romania? Or the Ruhr area in Germany? During a mission to a target in Austria ? Or maybe…
The IG Farben chemical complex in today’s Kędzierzyn (Blechhammer South) was one of the most heavily defended targets in Europe. The synthetic fuel plant was located on the eastern peripheries of the Nazi-occupied Europe where only the Italy-based US 15th Air Force was able to reach.
American bombers raided that area many times in 1944 during the campaign aimed at destroying the Nazi oil industry. On November 20, 1944, over 400 heavy bombers, escorted by nearly 300 P-38 “Lightning” and P-51 “Mustangs,” were dispatched to hit the industrial installations which escaped destruction during the previous missions. However, due to adverse weather, only a third of the bomber force reached the target area.
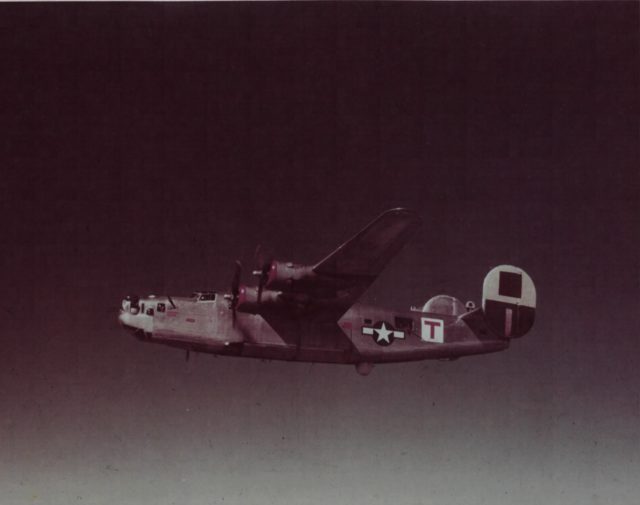
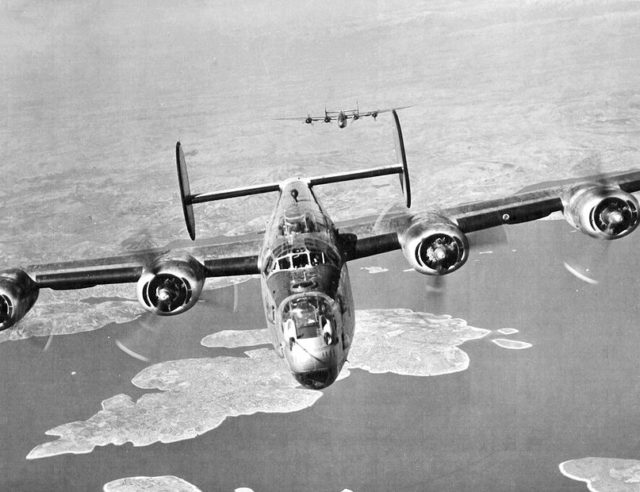
On that day, a B-24 marked “Blue I” carried more crew than usual. This was the lead aircraft not only for the Group but for the entire Bomb Wing. The “Liberator’s” commander was Lt. Col Clarence “Jack” Lokker, also the commander of the 781st BS 465th BG.
His crew was: Capt. Milton Duckworth (co-pilot), Lt. Joseph Kutger (lead navigator for the BW), Lt. Joseph Whalen (radar operator), Lt. Robert Hockman (bombardier), Lt. Grosvenor Rice (nav), Sgt. James Bourne (waist gunner), Sgt. Jack Rabkin (top gunner), Sgt. Paul Flynn (tail gunner), Sgt. Edmund Miosky (radio) and Sgt. Lee Billings (engineer).

The “Blue I” was in fact a tactical marking, not a given name. At the end of 1944 each of the Bomb Groups of the 15th AF had been divided into “Red” and “Blue” forces. The latter ones, better equipped with electronics, were used for the long distance missions and for bombing without visual target identification.
Hence, the lead aircraft was marked the “Blue I”. Also, the lead aircraft carried extra crew, usually the lead navigator and the lead bombardier for the entire Bomb Group or Wing. Lead ship’s ball turret were removed and replaced with a BTO radar.
On November 20, 1944, the 465th BG took off at 0742. The bomber formation formed up at 5000 ft at setting up a course to the target at 0841. During the inbound leg, a heavy overcast had been observed, and it was not sure whether the primary target could be bombed. Already over the Initial Point (IP), it was decided that the formation could turn to bomb the secondary target.
A few moments later, the visibility started to improve and suddenly the target appeared down between the clouds. Since the entire formation was already bound for the secondary target, a 270-degree turn was ordered to return to the IP. Lt. Col. Lokker also decided to climb from 22000 ft to 23000 ft to avoid the large caliber flak. The message about the maneuver was passed to the 464th BG flying behind.
Suddenly things started to develop very quickly: just before the bomb run, Lt. Col. Lokker’s plane received a direct hit between the no.2 engine and the fuselage. Left wing started falling off, the aircraft rolled over, and the bomber immediately burst in flames. That very moment had been captured on the heading photo.
Sitting inside the “Liberator,” just behind the pilot (rearwards to the flight direction), was Lt. Whalen. Next to him, facing the flight direction, was Kutger with his radios. Kutger knew that the plane was mortally wounded for through the waist window he noticed the wing falling off.
He knew also that all that left was 2-3 seconds to leave the plane. He shouted to Whalen to abandon the ship, but Whalen was either wounded or killed, since Kutger saw no reaction in his eyes. Kutger grabbed chute with his right hand and jettisoned the bomb load with the left.
Right after that he jumped into the bomb bay, at the same time trying to put the chute on. He’d been falling through 20000 ft before he finally succeeded. He pulled the handle and after just a couple of swings under the fully opened chute he touched the ground. He was convinced that no one else made it from the bomber.
Lt. Col. Lokker quickly gave up attempts to save the bomber and left it through the top hatch. Rabkin, in the top turret, had just removed his seat and was leaving the ship when the plane suddenly tumbled and he fell back in. He hadn’t made it before the plane exploded and most probably was killed in flames.
Duckworth tried to get out through a waist window, but failed when the plane started spinning. He crawled to the top hatch, grabbed the top turret’s barrels and bailed out. When leaving the bomber, he noticed Hockman and Rice still in the nose of the falling plane.
Hockman managed to put the chute on and got out through the nose wheel bay. Rice had been navigating from the nose turret and got trapped without his chute.
Most probably, when the electric installation failed, he could not leave the turret and had no time to put a chute on. Bourne, Billings, and Miosky were in the rear, at the waist guns. Miosky was last seen standing over the escape hatch with his chute on.
The explosion of the aircraft had probably thrown him away from the hatch and he got trapped in the ball of fire.

The same explosion threw Bourne and Billings out. They could not remember the moment they left the ship, but falling down they both managed to open their chutes and land safely. They both were severely burned and wounded. Bourne recalled that he was standing at the waist guns, trying to get to the tail gunner.
He couldn’t do that because of flames. Next moment he could recall he was pressed against the top of the fuselage when the plane started tumbling. The subsequent explosion threw him clear, with a partly torn parachute and some ropes protruding from the pack.
At first, he tried to put them back in, but he could not remember when he pulled the handle. Somehow, he remained conscious, despite his severe burns. He lost an eye and broke a leg when landing.
Actually, he landed on the refinery they’ve bombed and was captured immediately. He spent a month in a hospital at Blechhammer. Right before the Soviet advance troops came, he was moved to the hospital in Bad Soden. He spent rest of the war on recovering from wounds and numerous skin transplants.
Flynn was trapped in the tail turret without a chute and had no chance to abandon the ship. Meanwhile, tragedy in the air continued…
…Flak over the target was heavy, intense and accurate. Smoke screen laid by Germans obstructed the target until some 40-50 seconds till bomb run. The deputy lead bombardier finally managed to see the synthetic fuel plant and, at 1227 bombs had been released. The formation failed to leave the target area as scheduled because the lead ship (Lokker) was shot down and the deputy lead received serious damage.
That plane was commanded by Fred Johnson with Tom Moore as co-pilot. After the bomb run, Johnson dropped off the formation, due to fracture of the fuel and hydraulic lines inside the bomb bay. After some hastily applied repairs, the “Liberator” slowly joined the formation. They made it to base, however landing gear had to be lowered manually.
The other wingman to Lokker’s plane was Ernest Taft. His bomber was hit soon after the lead ship, went into a dive and exploded. No chutes were seen. However, Taft and his navigator managed to escape. According to Taft, their top turret gunner bailed out without a chute, he either forgot to put it on or chosen that instead of dying in flames.
During interrogation, Taft was told that his crew had been captured by civilians. He was told that his co-pilot bailed out too, but Taft never saw him again. German reports captured after the war revealed that a number of airmen were lynched by civilians. This could explain the fact that Taft never saw any other crewmembers besides the navigator and that the Germans presented him with some personal articles belonging to his mates.
Another B-24 in Lokker’s formation was flown by Joseph Norman with his co-pilot Bob Wills. They flew directly behind the Lokker’s plane. They flew through the ball of fire that remained from the lead ship and “collected” it’s left main gear. With a tire still burning, it stuck to the nose of the Normans plane.
His crew thought that their plane also got hit and started bailing out. Two of them actually got out before Norman regained control and assured the rest that he could still fly the bomber. In fact, they got hit and trailed thick smoke from two engines.

Norman called over the radio that he was heading towards the nearest safe territory. He made it to the Russian-held area and landed safely on the Mokre airfield near Zamość, Poland. They later returned to base.
Flak cut the steering cables in the plane leading the second squadron of the 465th BG and it could not make a turn after bomb run. Therefore, the entire squadron flew straight through the flak barrage. The unfortunate crew was led by Lubie Robinson.
Not only the plane was crippled, but the ball turret gunner was also severely wounded. Since steel cables in the bomb bay were no longer needed, the engineer with some help from other crewmembers used them to repair the steering cables. They regained control over the plane and made it back to the base in Pantanella.
Fortunately, the remainder of the 465th BG suffered no loses and left the target area as planned. They were joined by survivors from the first two squadrons. The outbound leg was relatively uneventful, in the same weather conditions. One more American plane failed to make it back and its crew bailed out. The 18 surviving B-24s landed at 1630.
The after strike photos revealed direct hits in the hydrogenation chambers, injector and compressor houses, with two secondary explosions in the latter. Further hits and fires had been identified right next to power stations and tanks.
Many other hits were also noticed in the production installations and in the neighboring living quarters. Refinery’s northern railway junction located in the western part of the complex had been hit with a series of bombs; further hits also damaged railway sidings.
Luftwaffe released only a brief report “…in Blechhammer damages are moderate, in Blechhammer Sud light, Odertal not hit”. On that mission the American losses totaled 16 B-24s (including the four ships from the 465th BG) and two P-51s.
The author, Szymon Serwatka, has been researching US Army Air Force over Poland in WWII for more than 20 years. He offers WWII history tours to Poland, which include USAAF museum at Blechhammer and B-24 crash locations.
By Szymon Serwatka
Translation: Piotr Wiśniewski
