The earliest documentary evidence from The Tank Museum Archive on the subject of Tiger 131 tells us that the tank was recovered from the battlefield by Major Douglas Lidderdale of the Royal Electrical and Mechanical Engineers on 7 May 1943.
Lidderdale was responsible for getting Tiger 131 from the battlefield in Tunisia to the School of Tank Technology in Surrey where Gudgin would later conduct his evaluation. It was under Lidderdale’s command that Tiger 131 was pictured with Churchill, The King and on Horse Guards Parade – and he remained with the tank all the way back to the UK.
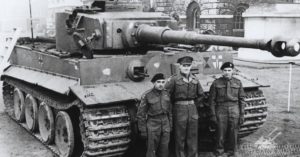
Above, you can see it on display at Horseguards Parade in November 1943. Douglas Lidderdale is pictured centre.
Back in 1943, Lidderdale clearly and carefully recorded in his diary that the tank was removed from Point 174. A copy of the records he made at the time are held in The Tank Museum Archive. This begs an important question: how has this evidence been overlooked for so long?
That’s precisely the question Dale Oscroft asked when he approached The Tank Museum with his findings in 2016.
Correspondence Between Lidderdale & Gudgin
What may surprise many is that Lidderdale and Gudgin knew each other; both in wartime at the School of Tank Technology and in peacetime when they exchanged letters on the subject of Tiger 131.

Lidderdale was himself visiting The Tank Museum in the 1980s when, in conversation with the curator on the subject of Tiger 131, he was informed that there had been an ‘error of attribution of the formation responsible for knocking out No. 131’.
As a result of that, the 25 Tank Brigade (of which included 142 Royal Armoured Corps – the importance of which will soon become evident) diablo had been painted out and replaced by the diablo of 21 Tank Brigade (which included 48 Royal Tank Regiment).
The Curator, Colonel Hill, recommended Lidderdale contact Peter Gudgin who could give him ‘chapter and verse’. This began a cordial correspondence between the pair as they compared notes on their involvement with this important prize of the Second World War.
Reading the correspondence now, it is possible to see how two slightly differing perspectives are merged together to create the story we now know to be incorrect.
On recovering Tiger 131 from the battlefield, Lidderdale had been told that 142 Royal Armoured Corps of 25 Tank Brigade had knocked it out – but Gudgin informed him it was, in fact, 48 Royal Tank Regiment of 21 Tank Brigade.
Lidderdale’s willingness to accept Gudgin’s narrative of events prior to his own involvement is summarised in a letter to Colonel Hill in 1987; “He was there at the time, I only later.”

Intriguingly, the matter of location is not discussed in their correspondence. This is crucial to the confusion and inconsistency in the historical record Dale Oscroft sought to wrestle with in his research.
Thirty years on from their correspondence, it seems they had made the same mistake The Tank Museum had made in re-telling the story – and it is plausibly simple.
Lidderdale did not seem to realise that Point 174 was not Djebbel Djaffa. In turn, Gudgin did not realise that Djebbel Djaffa was not Point 174.
As a result, this was something they did not discuss and therefore did not disagree on.
However, as Dale Oscroft continued his research the story took another turn, as it emerged that just after their action at Djebbel Djaffa, 48 Royal Tank Regiment were themselves in action at Point 174 – and Peter Gudgin was among them.

A message from The Tank Museum:
“Please Support Us: As a charity, we rely on public support for all our activities. Our work is funded entirely by people like you. With your support, we can continue to create content. With the right support we might be able to do it more regularly – and can be even more ambitious. Please Click on the Banner Below.”

Thanks to the Tank Museum for this Blog, which originally appeared here.